Pages

Showing posts with label Caran D'Ache Neocolor II. Show all posts

Friday, 30 October 2020

Paperbabe Stamps Challenge ~ #131 Picture Inspiration

 Hello Creative Friends. 

It's time for a new challenge over @ Paperbabe Stamps 

This fortnight we give you a Picture for Inspiration below. 
Use it to inspire you and come share your creativity HERE.


*Here's my interpretation of the challenge*


Inspired by the colours and shapes in the picture prompt and techniques 
discovered during a Laly Mille workshop I created a divided journal page. 

Working within the lines I've used scraps from previous Paperbabe 
creations using Paperbabe STAMPs and STENCILs, embossed pastes, 
paint, leaves and lace to create a mixed media journal page.. 

Here's a closer look of my two favourites 

A happy little leaf family.. 


Uplifting quote from Picasso alongside a dormant Sunday best dress..


Whether i'll keep this A3 page as it is, create a smaller journal 
or divide each section individually, i'm undecided but I must say 
the process was very relaxing to work on from start to finish..

Look forward to seeing your 

Stay safe & creative 
Tracey xx

Sharing today's creativity with: 
Paint Party Friday ~ Week 35 Year 10
Try it on Tuesday ~ Embossed
Art Journal Journey ~ Chris's Theme *Hold the Line*

Friday, 1 June 2018

Paperbabe New Release ~ Clockwork Frame

It's the third and final day of the *New* Paperbabe releases
and today it's my turn to share what I have been up to using the *Clockwork Frame*

Using the Hatter and Rabbit template I sketched in the faces directly onto the MDF Board.
I used the gear and tea cup overlaying panel piece (included in the kit) as a guide and reminder to myself to leave enough room for those important details.


The new stripes and gears stencils are a two way system allowing you to mask off 
and layer over the top to add the gear details, the pattern also repeats giving you the 
option to design on a much larger scale... the limits are endless


The new eye masks are the perfect addition to the collection helping to mask around the 
stamped eye stopping any overhang from showing when the pupil and iris are stamped in.


Laying down the base colours using neocolor II I added the finer detail with pencils.


The pocket watch, tea cup and extra gears are all separate elements included 
in the Clockwork Frame Kit. Added sand paste mimics corrosion and 
media fluids create that deep rusty colour.


Pencil and a fine liner adds shade and definition down the stripes and around those gears 
with any unused elements added to the background area to replicate gear fasteners.


With the wall hanging fastenings glued onto the back 
my Clockwork Frame is complete.


Paperbabe *NEW* Releases will be available to purchase on the website from 2nd June
a fabulous addition to compliment the Alice Collection or for larger mixed media pieces.

Thank you for taking time to pop on over and take a look.
Wishing you a marvellous week.

Creative Hugs
Tracey xx

Paperbabe Stamps

Friday, 25 May 2018

Paperbabe Challenge #74 Doodles

It's Friday Yay... 
and an extended weekend awaits with another
UK Bank Holiday.

It's time for another Paperbabe Challenge with this fortnight being doodle themed 
so for those of you that like to doodle, draw or just make marks 
this challenge may be just for you.

Here's my take on #74 Doodles Paperbabe Challenge along with those How to Do's..

Onto a postcard sized piece of water colour card I traced around the mini head 
and torso templates along with the short hair and fringe, marked out the 
facial features using the guides given on the head template and 
used the mini female face stamps to stamp those features in place.

Neocolors II have been used to lay down those base colours.


Onto deli roll used to mop up inks I doodled 
using a nib (dip) pen and acrylic inks.


With the image glued into my postcard album created just for this size paperbabe.
I tore strips of those inked doodles and glued them to the top and bottom
of the image to create a decorative edge.


Blending any white area still showing with those neocolors I then added a little more
pastel colour blending with my finger to give that softer dreamy effect .

My Doodled edge Paperbabe Postcard is complete.


If you'd like to share your doodles with us please pop on over HERE
and join in with the Paperbabe #74 Doodles Challenge.

We'd love to see you there..
Wishing you a wonderful weekend
what ever you are up to.

Creative Hugs
Tracey xx


Creative Supplies:

Deli Paper Roll/Versafine ink pad

Friday, 27 April 2018

Paperbabe Challenge ~ #72 Anything goes..

It's Friday and time for a new blog challenge over at Paperbabe Stamps,
with this fortnights theme being everyone's favourite 

Time for a play day...

Onto the largest of three mixed media blanks I traced around the mini 
profile template and curly fringe. The mini profile stamps can be used to add the 
facial features but this time I chose to hand draw mine in with pencil. 

I used the colour of the MDF to guide my choice of skin tone 
using neocolors II to add the overall base colour.


Using all three mixed media circles included in the kit I created a scene, layering 
up those colours as they really soak into untreated MDF when activated with water.

You can see here just how the colour changes by repeating the process.


Hanging attachments are included within the mixed media kit and simply attached 
with a spot of glue, where you chose to place the hangers is entirely up to you.


Coloured pencils help to add those extra details.

I would have loved to have added more circles to this wall art; picking out areas of her hair 
and surroundings. The limits are endless but for the moment the trio sit side by side.

As She Ponders... the tilt of your head can predict her day..!!


I hope you too can find time for a play day and maybe join in 
with the Paperbabe Stamps blog Challenge, we'd love to see your creativity.

Wishing you all a wonderful weekend
Creative Hugs

Tracey xx

Creative Supplies:

Paperbabe Stamps ~ Female mini profile head and torso template 
Paperbabe Stamps ~ Female mini curly fringe template 
Paperbabe Stamps ~ Mixed Media Blanks hanging circles kit
Caran D'Ache ~ Neocolor II/Museum Aquarelle/Luminance

Friday, 2 March 2018

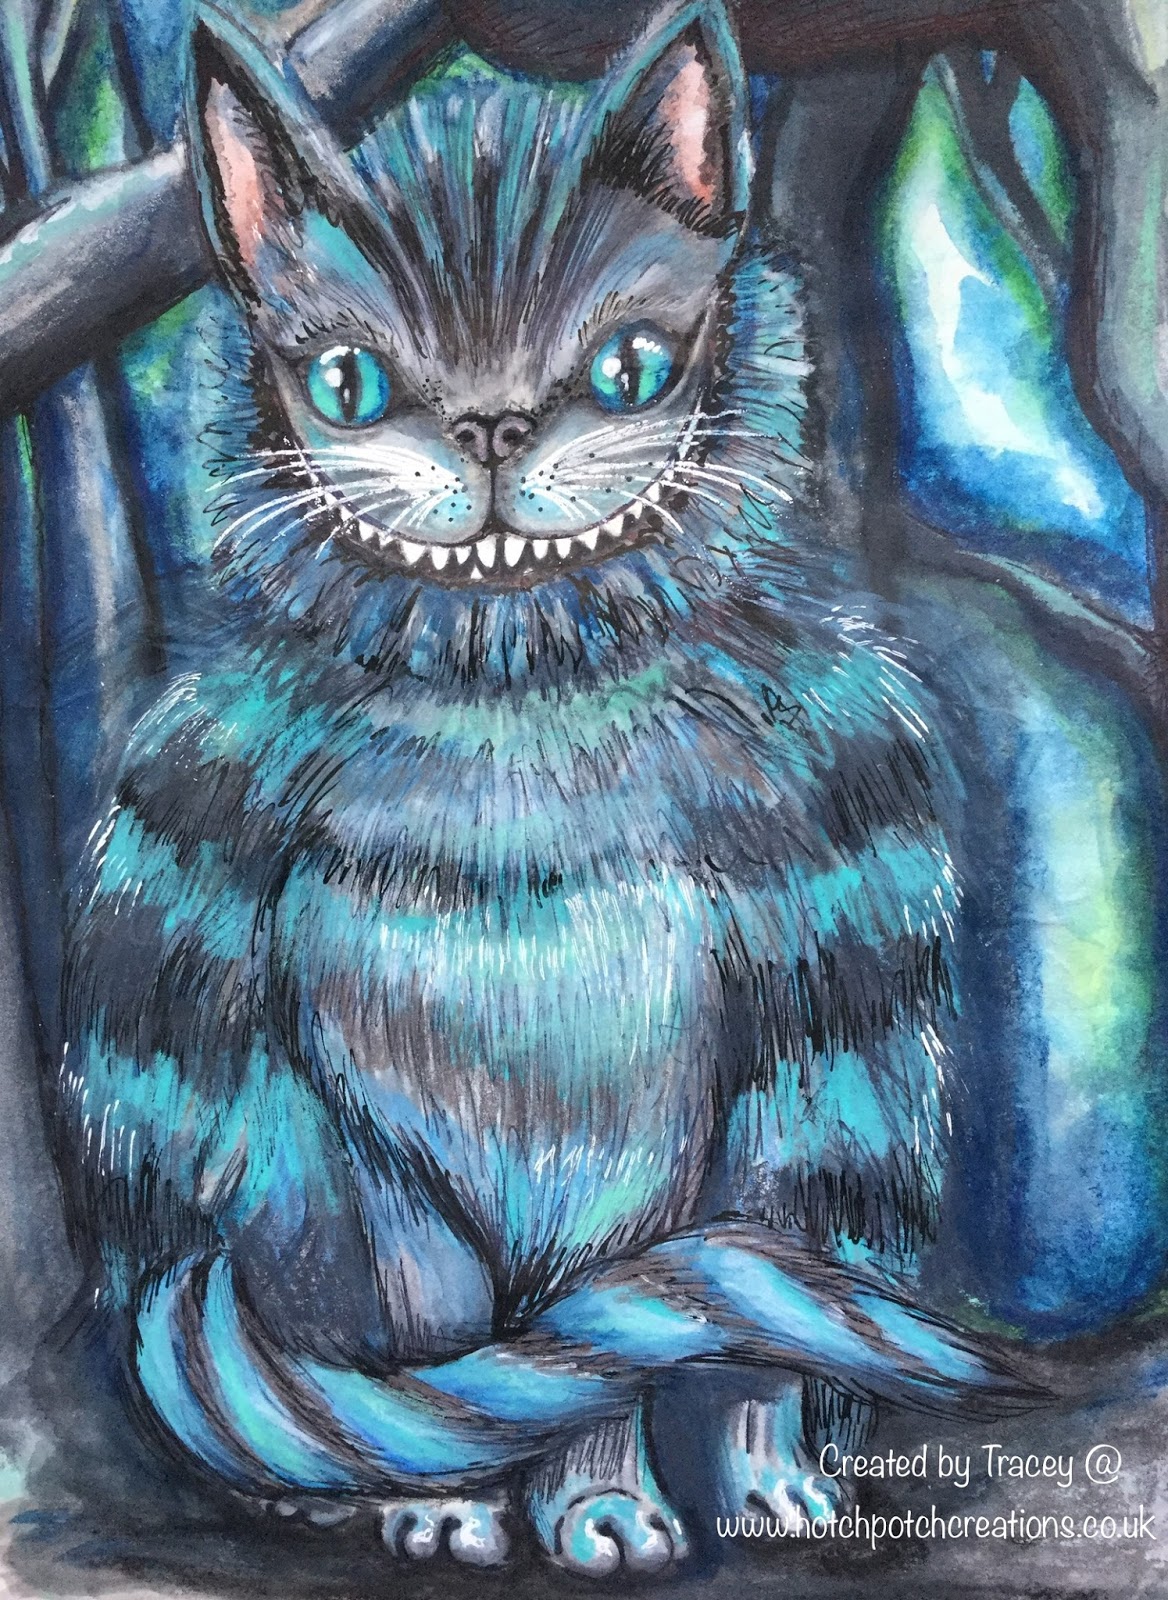
Paperbabe Challenge #68 - Anything Goes.. Chesire Cat.

Hello everyone,

I would normally say Happy Friday but I know due to the present weather conditions 
it may not be the happiest as nearly everyone I know has been affected by it.

First may I announce the winner of my *Giveaway* The Bottle of Stamps..
and try and lift the spirits of at least one person.

Congratulations to.... Fanfare..!!


Mrs B... you are a Winner.
Can you please email me with your address and I can get your prize 
on its way to you as soon as services are back up and running.

TODAY 
see's a new Paperbabe Stamps Blog Challenge over HERE
with this fortnights theme being ~ *Anything Goes* YAY..!!

Here's what i've been up to,
just skip over the words if you have not the time to read..

Tracing around the sitting Cat templates I'd already decided I wanted to 
continue the theme and create my Cat in the style of the modern day 
Cheshire Cat, so I don't really know why I drew in it's muzzle!
Oh well easily erased if you use pencil.


With my blues/greens and grey pencils nice and sharp and the
Face, nose and Cheshire smile stamped I began to sketch in some colour.


Adding a quick forest background a watercolour wash was laid down
ready for some finer detail to be added. I may even change his body shape a little..


Whiskers were stamped and embossed with bright white EP
and little dots added to ground them before adding the final shadow and shade.


With a little more excess to cuddle my Cheshire Cat is complete
although i'm not sure everyone would want to give him a cuddle.


Hmmm.. I really do need to fix his wonky tail...!
That will teach me to meddle with shape shifting..

We hope you can join us for the Paperbabe ~ #68 Anything goes Challenge over HERE
and pop on over to see what everyone has been up too.

Take Care everyone, stay warm and safe
and please don't venture anywhere if you do not have too..

Warmest of Hugs
Tracey xx

Paperbabe Supplies:

Paperbabe ~ Cat template 
Paperbabe ~ Cat face stamps
Pink Pig Sketchbook
Caran D'ache

Friday, 15 September 2017

Fly Away Family...

Hello everyone can you believe we are already midway through September.
How time does fly! Speaking of flying, "Fly Away" is this fortnights challenge theme 
over on the That's Crafty Challenge Blog. So if you would like to spread your wings 
and share your flights of fancy there's a chance to win a £20 voucher to spend in the 
That's Crafty online Store for the chosen winner.

Here's my Fly Away Family creation 
and those how to do's..


Using one *SIZE #10* and three *SIZE #1* MDF That's Crafty Tags , I first coated in white Gesso and scribbled on colourful water soluble pastels, spritzing with water to move them around the tag. After drying with a heat tool I placed the Bare Tree Stencil over the large tag and with a wet wipe traced around the stencil removing some of the colour. 


It leaves an effective glow around the tree image
as it reveals the gesso surface.


I stamped and embossed the large Mama Owl and the three smaller owls 
colouring with bright water soluble pastels. Both stamp sets from 
Rubber Dance are Designed by Melina Dahl.


I finished the tag backgrounds by dripping gold That's Crafty multi surface 
paint down the tags and spritzing with water to speed up the process.

Adding a strip of wood to the front and back of the tag gave me just enough thickness 
to screw in three hooks to act as hangers. Disguised by branches from the Mama Owl stamp set, Mama Owl sits perched proudly on top.


The three small *See No Evil- Hear No Evil & Speak No Evil* owls
fit perfectly on the small tags and with added chains hang onto the hooks.


My Fly Away Family key chain holder is complete.


This piece is quite symbolic for me having three children who one by one are 
flying the family nest, but they know exactly where to find me if needs be 
and as always Mama Owls wings will be wide open when they come to visit.

Thank you for sharing your time, I do hope you can join in with the challenge and 
please remember to check out the fabulous That's Crafty Design Teams makes
over HERE.

Until next time stay safe & take good care.

Creative Hugs
Tracey xx

*I'm sharing this with the Rubber Dance FOREVER Stamping Challenge,
a place to showcase your Rubber Dance Stamp makes with the anything goes theme*

Crafty Supplies:

That's Crafty MDF #1 Tags
That's Crafty MDF #10 Tags
That's Crafty Stencil: Bare Tree
That's Crafty Gesso: WHITE
That's Crafty Multi Surface Paint: GOLD
Rubber Dance Stamps: Mama Owl
Rubber Dance Stamps: Owl do Good
Caran D'ache Neocolor II water soluble wax pastels
Embossing powder/versafine ink

Tuesday, 5 September 2017

Warm Hugs..!

I've been itching to use these candle substrates by Paperbabe, as soon as I saw them
I had so many ideas of how they could be used. I jotted down a few
as ideas can easily be forgotten when times are busy.

I decided to incorporate one of my ideas with the latest Sketch challenge, 
Here in words and pictures is my Warm Hugs Card.


Using an A4 sheet of stamping card I painted it sporadically in white Gesso and dried with a heat tool. When completely dry I Stamped all over the page both large and small Pom Pom stamps from the DesignA Knit set and heat set with white embossing powder.
Spritzed with Bayou Gold starburst spray. The embossed pom poms act as a resist, the Gesso resists the spray slightly and the plain card takes the full colour of the spray.
A great effect using just one colour.

Cut to the required size I used the left over card to cut the banner shapes from the
Paperbabe Sketch. I also cut and coloured a circle another Sketch prompt.


I found just enough space on my background to stamp this Paperbabe sentiment. 
I love how it leaves  a blank area for you to stamp or write a name of your choice. 
This time I just stamped the word *your* also from the DesignA Knit set.

                     
Coloured with neopastels I coated the  candles in clear versamark and heat embossed 
with clear embossing powder accentuating those waxy candle drips.


With the Sketch prompts edged in gold embossing powder and layered onto the card
my *Warm Hugs* Card is complete.


I love how the colours blend so well together from subtle creams to rich golds, the romance of the sentiment and the reference of light and life. A real joy to make.

Take Care everyone until next time.

Creative Hugs
Tracey xx

I'd like to enter this into the
Paperbabe Stamps Challenge #55 Sketch

Crafty Supplies:

Paperbabe: DesignA Knit Stamp Set
Paperbabe: MDF Candle Substrates
Stamping Card
White Gesso
Versamark Embossing Ink
White Embossing Powder
Lindy's Stamp Gang Sparkle Spray: Bayou Boogie Gold
Stampendous Fine Deatil: Gold Embossing Powder
Caran D'ache neocolor II pastels

Thursday, 3 August 2017

Mini Gift bag make over plus some extras

Today i'd like to share a little revamped gift bag made for a swap challenge along with some other little makes all created using Rubber Dance Stamps Designed by Katy Leitch.

Here in words and pictures is my revamped mini gift bag plus..

Using Dylusions paints on a Gelli plate I printed both sides of the paper bag,
stamped randomly onto the print adding dabs and scrapes of gesso.


Paint in primary colours was dripped down the bag and the palette, paint brushes
 and wording stamped, coloured and cut. All from the Artist palette stamp set.


I made a tag using one of the paint tube stamps and decorated extra large paperclips by attaching the paint brush images, coloured in using neocolor pastels
 and Kuretake wink of stella clear, gold and silver brush pens.


Clipped onto the paper bag the paint brush paper clips really do look like
they are full size with their coordinating paint dips and drips.

My Mini altered Gift Bag is complete and ready to send to it's new home.


I also made some ATC's for another swap..


and a Birthday Card!
All having liquid pearls added for the dipped paint effect on the brushes.


I do love this stamp set, great designs and so handy for creating something Arty.

I'm linking this up with the all new Rubber Dance Stamps Forever Stamping Challenge
 a continuous challenge where you can showcase your Rubber Dance makes.

Thank you for stopping by today,
Take Care & Stay Safe

Creative Hugs
Tracey xx

Crafty Supplies:

Rubber Dance Stamps: Artist Palette
Mini Paper Gift Bag 3" x 5"
Gelli Plate 3" x  5"
Dylusions Paints: Vibrant Turquoise/Pure Sunshine
Caran D'Ache: Neocolor water soluble pastels
Kuretake Wink of Stella: Clear, Gold & Silver
Ranger Archival Ink: Jet Black
ATC's

Friday, 7 July 2017

1, 2, 3 ATC

WELL..!!  I can hear you all say "What's all this Mess?" 
Grab yourself a cuppa and i'll tell you all about it..


Well this project all started with the words *Found* a Theme given for an ATC Swap I contribute to each month. I have so much stored away in pretty jars but the majority of it has little or no importance, just odds and ends hidden away with the hope of discovering that hidden gem each time I rummaged through it...

The Blog Challenge Theme for the next fortnight over at That's Crafty is *Anything Goes* and these little ATC's seemed to fit the bill nicely, showing that you really can create something from nothing.. 
I hope you can pop along and check out all those inspirational makes from the DT and maybe join in as there's a chance to win a £20 voucher to spend in the That's Crafty Store.. 

Here in words and pictures is my 1,2,3 ATC

Covering an MDF ATC in a layer of lace I Gesso'd over the top and added some of those 
bits and bobs, sticking them down with lots and lots of heavy body gel. 


I added micro beads into the exposed gel and then left them for 7 whole days.. yes 7!! 
As the amount of gel used was so thick and I knew these would be travelling to a new destination I needed to make sure that the gel had cured properly and also that those items would stay where I had put them..!


..One week later.
All dry and stuck down firmly.. so time to play.
I coloured each ATC differently using neocolor pastels and covered with mat medium to protect any further movement of colour. These colours were my base coat on which I could build up with more colour.


Now this is my favourite bit, bringing out all the detail by using raw umber paint and coordinating coloured alcohol markers around each element. Creating depth, shade and highlighting those prominent areas with bronze, antique gold and antique silver shimmer paints to give the appearance of reflection of light with a dot and dab of white Posca Pen.

Each ATC is finally edged with a little gilding wax.. and my ATC's are complete..


You really do need something substantial to adhere so much onto as you do not want them to buckle or bend whilst on their travels. The MDF ATC's are fabulous surfaces to work on and I believe they have now found new homes.. hopefully well received.?

Thank you for sharing your time, I hope you have been inspired.
What ever you are up to this week I hope it's a crafty one.

Stay Safe.. Creative Hugs.. Tracey xx


Crafty Supplies:

Bits and Bobs from my own crafty stash!
 Alcohol markers (Browns/Greens/Blues) Not my best ones.
That's Crafty MDF ATC's 
That's Crafty White Gesso
Heavy body Gel
DecoArt Matte Medium
Carn D'ache neocolor II water soluble pastels
DecoArt Raw Umber
That's Crafty Shimmer Paints
Prima Finnabair Art Alchemy Metallique Wax
White Posca Marker Pen