Pages

Showing posts with label #PaperbabeStamps. Show all posts

Friday, 26 April 2019

Paperbabe Challenge ~ Flower/Garden

Happy Friday Creative Friends

It's Challenge time again over at Paperbabe Stamps 
and what better way can there be than to start the creative 
ball rolling by offering a Flowers/Garden theme Challenge.

Here's my Paperbabe DT creation and how it came to be... 

Onto a plain cushion cover I scraped on fabric paint, mark 
making by pushing those fabric paints through Paperbabe Stencils
Those pops of yellow remind me of bursts of springtime sunshine!


Stamping the Doll Face Stamps onto fabric gives strong 
guide lines perfect for a little embroidery.


The large Peony taken from the Peony & Bud set has been stamped 
onto rice paper and transferred onto the cushion cover using 
a washable fabric glue and painted with fabric paints.


I made a Peony fabric brooch embellished with beads and lace.


Sewing the embroidered face onto the cushion I added two rice paper 
Peonies to balance the design with the brooch taking centre stage.  

A flower border embroidered at the bottom helps to ground her, 
completing my Paperbabe mixed media Springtime cushion.


We'd love you to share your Flower/Garden designs over HERE,
Pop on over there's a Paperbabe prize to be won 
for one lucky participant.

Wishing you all a wonderful day.
Creative Hugs
 Tracey xx

I'm sharing today's creativity with:

Kristin & Eva ~ PPF Wk8 Y9
TioT ~ Springtime
Bleeding Art ~ Add Stenciling
Altered Eclectics ~ April Challenge
Inky Messy ~ Challenge 30
Country View Crafts ~ Easter and/or Spring
A bit more time to Craft ~ #90 Anything Goes
More Mixed Media Challenge ~ ATG/Optional Yellow
World Wide Open Design Team Monthly Challenge #4 

Friday, 9 November 2018

Paperbabe Stamps Challenge ~ #86 Animals/Pets

Happy Friday Creative Friends,

There's a new challenge theme over on the Paperbabe Blog  
with this fortnights theme being Animals/Pets. 

I couldn't resist using the White Rabbit templates for this challenge.
Traced onto a canvas sheet I stamped those Rabbit Face features and used the 
Cat template to give the shape of the body.. The Rabbit ears I traced separately.


Poppies are so relevant this time of year this napkin adhered 
to the Ornate Frame made the perfect backdrop.


It's hard work using pencil on canvas sheets, I lost count of the amount of times 
I had to sharpen those pencils.. but it gives an alternative effect to paints. 


A wash of blue helps create the skyline with left over poppies 
mounted onto card waiting patiently to be layered on top..

I cut a boarder around the Rabbit and ears so I could pull the canvas edge apart to 
create the appearance of fur tufts. Now to decide exactly where those ears will go..


With those Rabbit ears tweaked into position and wire whiskers glued into place, 
those left over poppies are layered up to complete this idyllic scene.


I do hope you can pop over and see what the Design Team have been up to. 

Come and share your Animal or Pet designs over on the Paperbabe Stamps Blog 
you may just be the Lucky winner of a Paperbabe prize.

Wishing you all a Peaceful weekend.
Creative Wishes

Tracey xx

I'm sharing today with..
Kristin & Eva over at PPF
A Bit More Time to Craft ~ Challenge #79 ATG
and
CED ~AEDM

Friday, 2 November 2018

Paperbabe Stamps Picture Challenge~ #85

Hello everyone

I'm a little late with this creation but here's a reminder that there's still time to 
join in with this fortnights Picture inspired Paperbabe Stamps challenge over HERE.

Use the picture/colours below to awaken your creativity and be inspired. 
There's still a week to play and a Paperbabe prize for one lucky participant. 
Come and share your creations with us over on the Paperbabe stamps Challenge Blog..


Here's what I got up to and those quick *How to Do's*

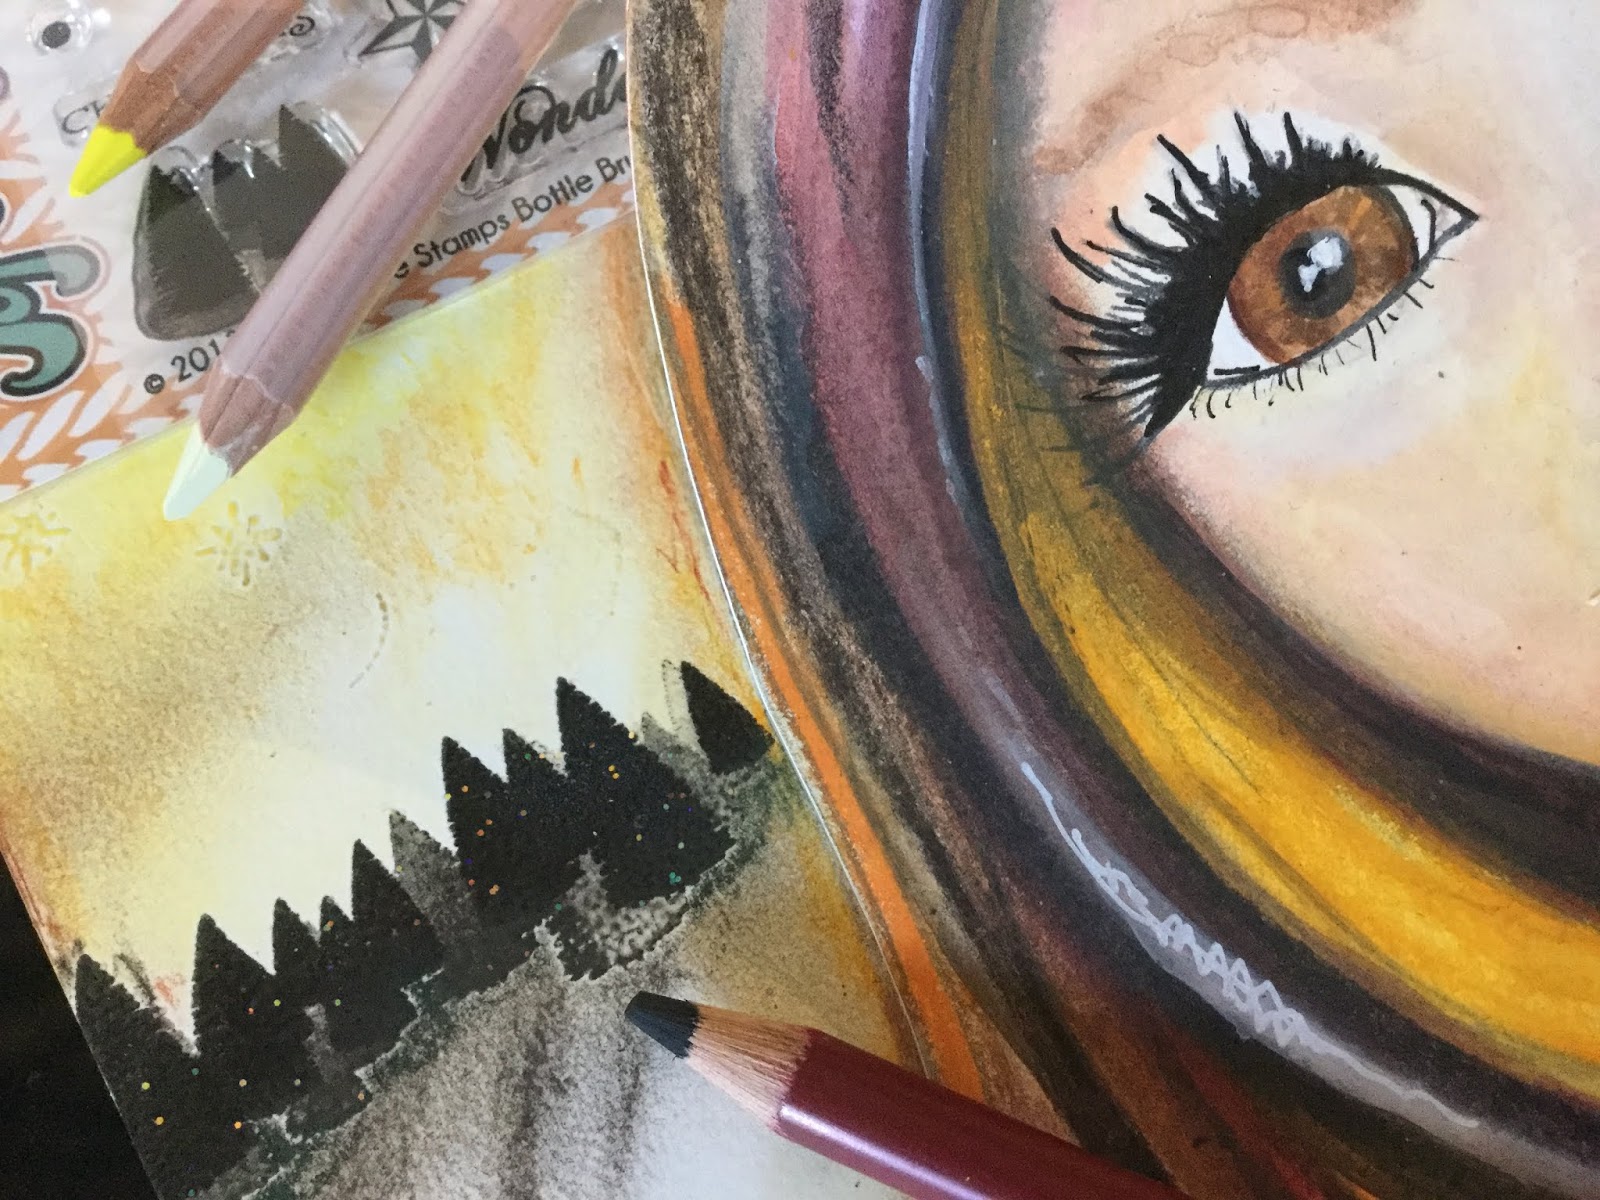
Using the Paperbabe Female Head & Torso Template I traced round the face and 
stamped out some female facial features. Using the colours from the picture prompt I 
free styled those strands of hair and began to colour using pencil & neocolors


Tree's from the Bottle Brush Tree set were stamped and embossed along the horizon. 
There must have been some random flecks of glitter hidden within my clear 
embossing powder as there is a definite sparkle upon those trees. 


Pastels smudged around the hairline and tree's adds an air of mystery 
along with oil pastels and inks all fixed with a coating of varnish. 

Most bewitching!!


Wishing you a fabulous weekend.

Take Care everyone & make time yourselves.

Creative Hugs
Tracey xx

I'm sharing today with...
Kristin & Eva ~ Paint Party Friday  ~ AEDM and
More Mixed Media Challenge ~ ATG/Optional Orange

Friday, 12 October 2018

Paperbabe *Anything Goes* Challenge #84

Hello Creative Friends

It's Anything Goes over on the Paperbabe Stamps blog this fortnight 
and we'd love you to share your creativity with us over HERE.

Pop on over and see what the Design Team have been up to.. 
There's a prize for one random winner every fortnight..

Here's what I got up to one rainy play day.

As Halloween and Dia de (los) Meurtos approach I chose to mix and match 
the male, female and sugar skull stamps as they all work perfectly together 
alongside those Paperbabe Portrait templates.


The daisy stamp from the sugar skull set was used to create a lace effect.
With the outer edge of the torso template acting as a mask it keeps 
the stamp within the lines... such a time saver..


Again those template edges act as a guide but this time helped me add those 
darker areas whilst still keeping the shape of the Blunt Bangs hair style.


Adding my favourite shades of watercolour pencil and paint, I find a good 
gesso invaluable as it not only adds those important highlights but also 
tones down over worked areas with what ever medium you choose.


Keeping those colour tones similar a dot of black diamond glitter glue 
has been added to the centre of each flower to bling it up just a little.


The rose from the sugar skull set has been stamped onto a colour wash background 
and coloured with watercolour pencils. Cut out they are ready to add to my page.


Used to embellish the hair and garment those final 
gesso highlights complete my Paperbabe Journal page.


I'm very much in my comfort zone with portraiture but 
the Paperbabe face stamps and templates give me the confidence 
to share the magic they can create, much more than my own sketches.

Thank you for stopping by today.

Wishing you all a super weekend.
Creative Hugs Tracey xx

I'm happily playing along with:
Art Journal Journey ~ Creature Comforts hosted by Linda
and Paint Party Friday ~ Courtesy of Kristin & EVA


Creative Supplies:
Paperbabe Stamps ~ Standard Male and Female portrait torso templates 
Standard Male and Female Face Stamps and Standard Sugar Skull stamp set.
Paperbabe Stamps Red Rubber ~ Comfort Zone quote
Caran D'Ache Neocolor II's ~ Supracolor pencils and Indigoblu paints

Friday, 28 September 2018

Paperbabe SKETCH Challenge ~ #83

Hello Creative Friends,


Use it's shape to inspire you and the image to represent your design.
Mix it up, be creative, it's really up to you how you interpret it.


Time has been very limited for me this week so I set myself a 
personal challenge to see what I could come up with in 1 hour.

Here's what I got up to and those simple *How to Do's*

Using the leaf and conkers from the Completely Conkers stamp set, 
Distress Oxides were my choice of ink to stamp onto both Kraft and white card.


Onto an A6 card I stamped one of my favourite stamps from the 
Spritz & Speckle set along with the completely Conkers sentiment.

5 leaves and 5 conkers were fussy cut and teased into shape ready to assemble.


Glued down using 3D Gel my CAS card is complete.

It's really that simple ..


Hope you can find a moment to pop on over HERE and join in with the challenge.
There's a prize for one lucky random winner.

Wishing you all a fabulous weekend.

Creative wishes
Tracey xx

Creative Supplies:

Paperbabe Stamps ~ Spritz and Speckles and Completely Conkers 
A6 Card & Distress Oxide Inks

Friday, 21 September 2018

Hello Autumn

Hello Creative Friends,

Can you believe we are on the brink of Autumn.
Already the leaves have started to change colour and fall.

Here's a little Autumnal creation created during a much needed play day.

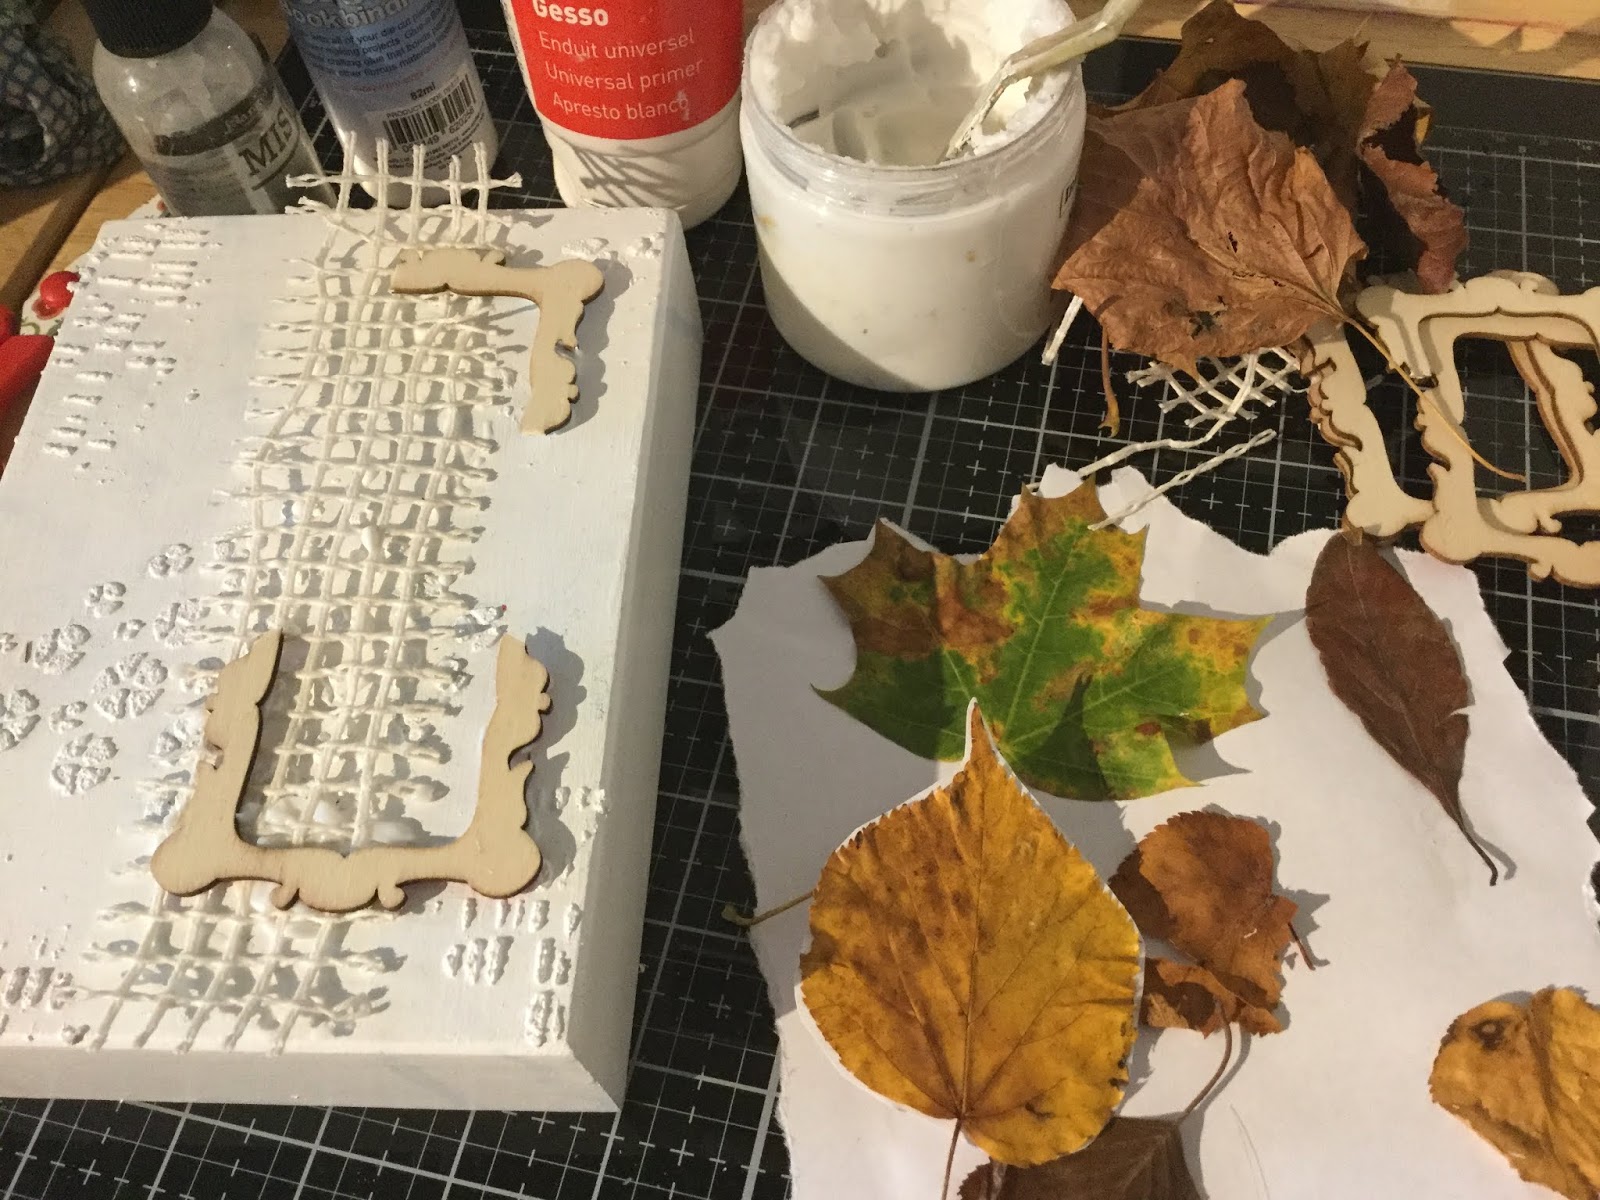
I found this wide rimmed wooden frame in a charity shop, painted in gesso 
and applied sand paste through AALL & Create stencils. 
Embellished with a strip of tapestry canvas & parts of a plywood frame 
I then painted it all in gesso again.

Found leaves have been glued onto a recycled envelope to
hold their shape and to stop them from drying out so quickly.


Filling in the gaps of the frame with art stones a third coat of gesso is applied


Drops of alcohol inks are spritzed with water and white gesso 
used to knock back the brightness of the colour.


Stamping a versamark embossing ink pad onto the leave and embossing 
with clear embossing powder help to preserve those beautiful leaves.


Time to start layering those natural elements.
I chose to use just one of the leaves and team it up with some fallen twigs,
Added a whimsical word from Paperbabe stamps, a dot and dab of
liquitex gold ink and a flick of white paint.


My Autumnal box frame is complete.


I do love the warmth of colour that Autumn gives.

Thank you for sharing your time.
Wishing you all a super weekend.

Creative Hugs & Wishes
Tracey xx

I'm sharing this with ...

A Vintage Journey ~ Back to Nature
More Mixed Media Challenge ~ Anything Goes + Optional Brown
Try it on Tuesday ~ Slap it On
and Kristen & Eva over at PPF

Friday, 3 August 2018

Paperbabe #79 Sketch Challenge

Hello Creative Friends

It's Friday Yayyyyy... 
..weekend i'm so looking forward to you after the busiest of weeks..!

It's time for another Challenge at Paperbabe Stamps.

This fortnight we are asking you to use the sketch below and be inspired.
The "Paperbabe stamps" can represent any sentiment.
Use the shapes as prompts, flip, turn and create your own design. 

There's a prize to be won for one random winner.


Here's what I got up to using the Sketch, along with those How to Do's.

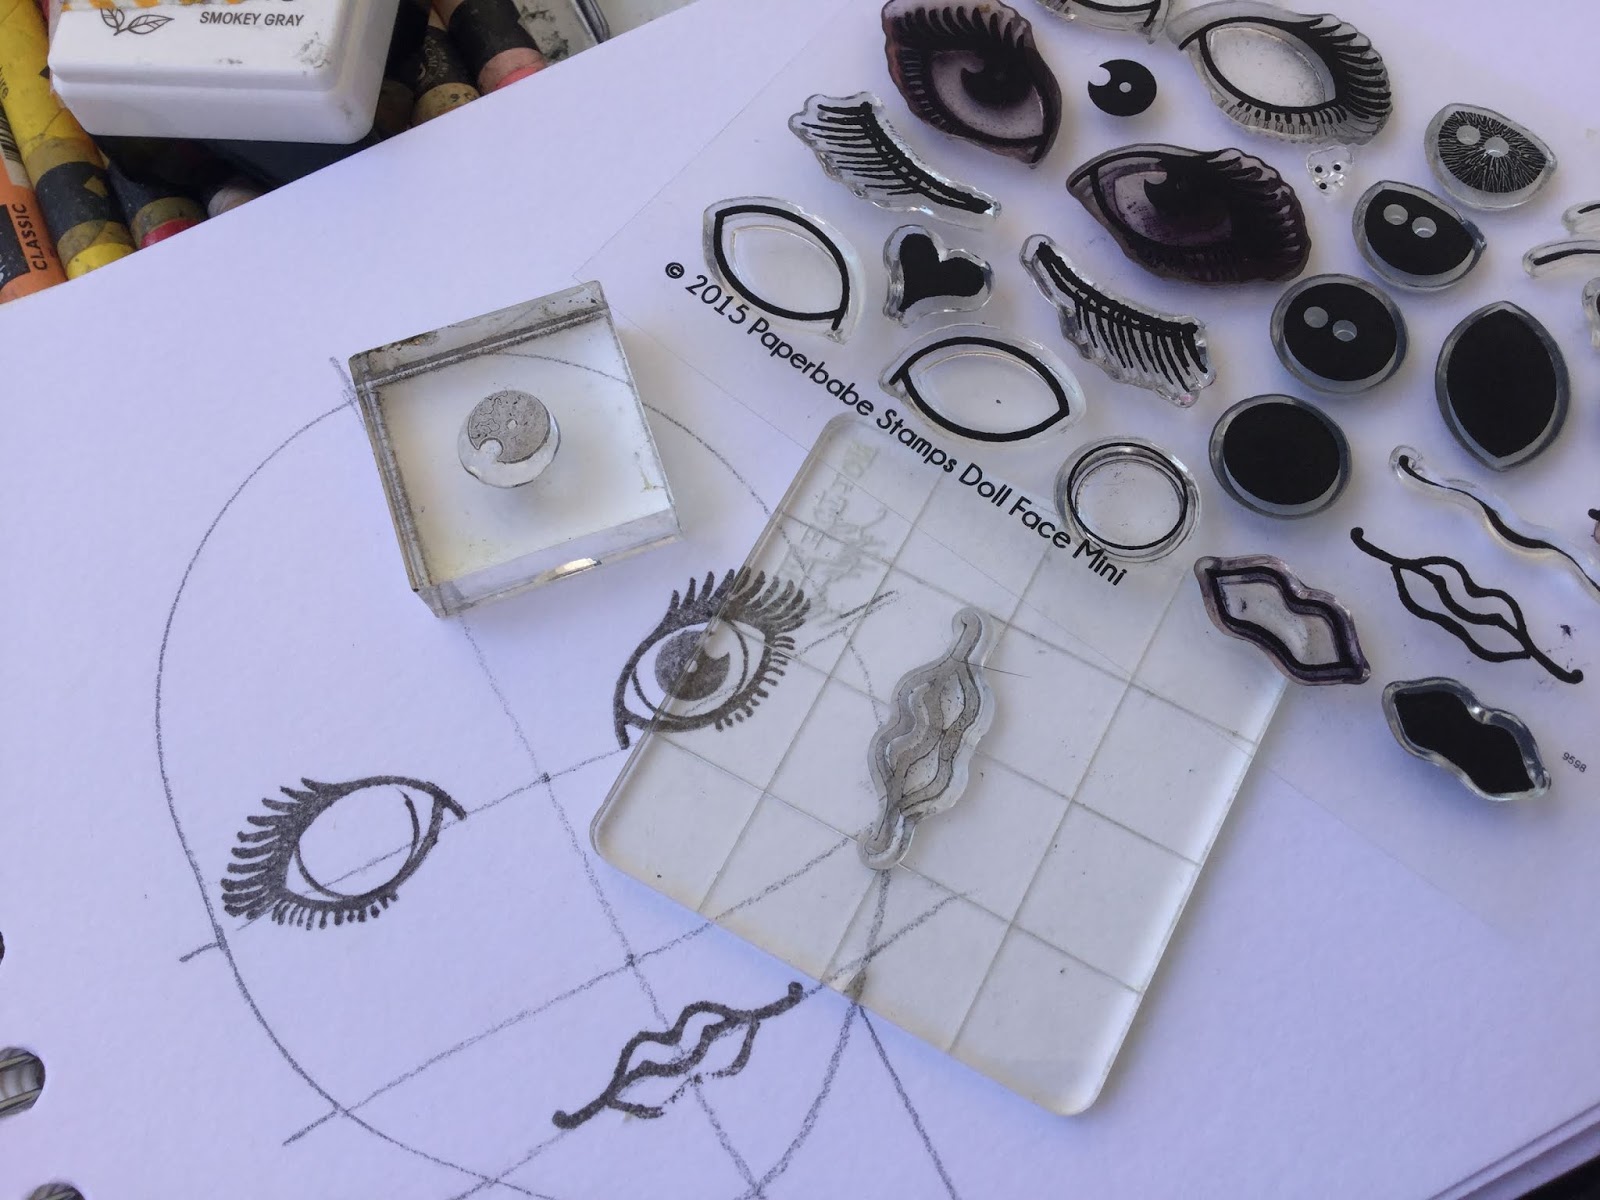
Drawing around the Portrait Head and Torso Template I used the markings 
on the template to guide and help me to stamp those Doll Face features 
exactly where they needed to go.


Water-soluble and permanent pencil are used to colour my Paperbabe
with her hair line drawn free hand. Die cutting out her face will form 
the large circle from the sketch prompt.


With the die cut portrait mounted on to a larger die cut circle
this will hide the hole it has left when remounted over the aperture.

Two strips of paper are decorated in gems and left over lace 
to represent part of the sketch prompt..


With the *Your Sparkle* sentiment stamped boldly into the corner of the 
postcard it was time to layer all those sketch elements up and display them 
on to a lace, gesso'd and crackle glaze white space Journal page.

...but I think I need to stitch and distress the edge of that postcard first..!


The portrait design on the white mount area is continued to hide it.


Not happy with the colour match of her neck on the layered circle due 
to using a different cut of card (Silly me..) I decided the best thing to do 
was hide it and give her a Vintage style choker necklace.


With the Sketch piece glued onto the journal page I extended
the line and colour of the hair letting it flow from postcard to page.

The natural lace grips hold and absorbs the colour yet upon the simplicity of the
white gesso resists the watercolour almost washing it away from the background.


My Paperbabe Sketch is complete.

I love how the white space envelops her..


Thank you so much for popping on by..
I look forward to seeing your interpretations over HERE.

Wishing you all a wonderful weekend.

Take Care & Stay Creative
Tracey xx

Creative Supplies:

Paperbabe ~ Mini Head and Torso Mixed Media Portrait Templates, 
Paperbabe ~ Your Sparkle stamp
Water colour paper/card
Water soluble/permanent Pencil
Lace, Gesso and Crackle Glaze
Waterbrush/A4 Journal

I'm linking up with Eva & Kristin and joining in with the PPF
and
A Vintage Journey *How can I resist*

Friday, 25 May 2018

Paperbabe Challenge #74 Doodles

It's Friday Yay... 
and an extended weekend awaits with another
UK Bank Holiday.

It's time for another Paperbabe Challenge with this fortnight being doodle themed 
so for those of you that like to doodle, draw or just make marks 
this challenge may be just for you.

Here's my take on #74 Doodles Paperbabe Challenge along with those How to Do's..

Onto a postcard sized piece of water colour card I traced around the mini head 
and torso templates along with the short hair and fringe, marked out the 
facial features using the guides given on the head template and 
used the mini female face stamps to stamp those features in place.

Neocolors II have been used to lay down those base colours.


Onto deli roll used to mop up inks I doodled 
using a nib (dip) pen and acrylic inks.


With the image glued into my postcard album created just for this size paperbabe.
I tore strips of those inked doodles and glued them to the top and bottom
of the image to create a decorative edge.


Blending any white area still showing with those neocolors I then added a little more
pastel colour blending with my finger to give that softer dreamy effect .

My Doodled edge Paperbabe Postcard is complete.


If you'd like to share your doodles with us please pop on over HERE
and join in with the Paperbabe #74 Doodles Challenge.

We'd love to see you there..
Wishing you a wonderful weekend
what ever you are up to.

Creative Hugs
Tracey xx


Creative Supplies:

Deli Paper Roll/Versafine ink pad

Friday, 11 May 2018

Paperbabe Challenge #73 ~ Picture Inspiration

It's Friday Yay..!!
Time for a new challenge over at Paperbabe Stamps

Today we give you a Picture displaying a beautiful swatch of colour and shape,
use it to inspire your inner creativity and come share with us all over 
at Paperbabe Challenge #73


Here's what I got up to..

First I created a masterboard using water-soluble pastels picking out colours from the picture inspiration, scribbling, spraying and blending all over an A3 watercolour journal.


I lay paperbabe stencils over the masterboard and removed areas of colour by rubbing through the aperture with a wet cloth. Whilst doing this I noticed that the Knit stencil resembled ears of wheat so decided to use this to my advantage, creating a scene by sketching in a glorious sun. This area of the page I chose to use for my backdrop.


I stamped and embossed one of the large Butterflies onto vellum lightly colouring with alcohol markers. Smaller butterflies in the set were stamped directly onto the page.


Laying the knit stencil back over those lifted areas I scraped 3D gloss gel through 
with a palette knife,when dry it really makes those areas glisten.


Cut down to size the large Butterfly graces that large sun with the smaller dancing in the face of it. Not quite a Van Gogh with his depictions of those wheat fields but I was quite pleased how this turned out as it's not at all what I had initially intended to create.


We'd love to see your creations over HERE
*There's a prize for one Lucky winner*.

Pop on over and check out what else the Design Team have created just for you.

Wishing you Sunny Days and a wonderful weekend ahead.

Creative Hugs
Tracey xx


Creative Supplies:

Paperbabe ~Knit Stencil 
Caran D'Ache neocolors II
Watercolour Paper
3D Gloss Gel