Pages

Showing posts with label Distress Oxides. Show all posts

Friday, 3 April 2020

Challenge #116 ~ Paperbabe Stamps Birthdays Theme

Hello everyone, 

with this fortnights theme *Birthdays*... 

Everyday is a Birthday and I can think of no better time than 
NOW to share the love and appreciation of a friend or loved one 
by creating a little something to celebrate their special day. 

Here's what I created and how it came to be.. 

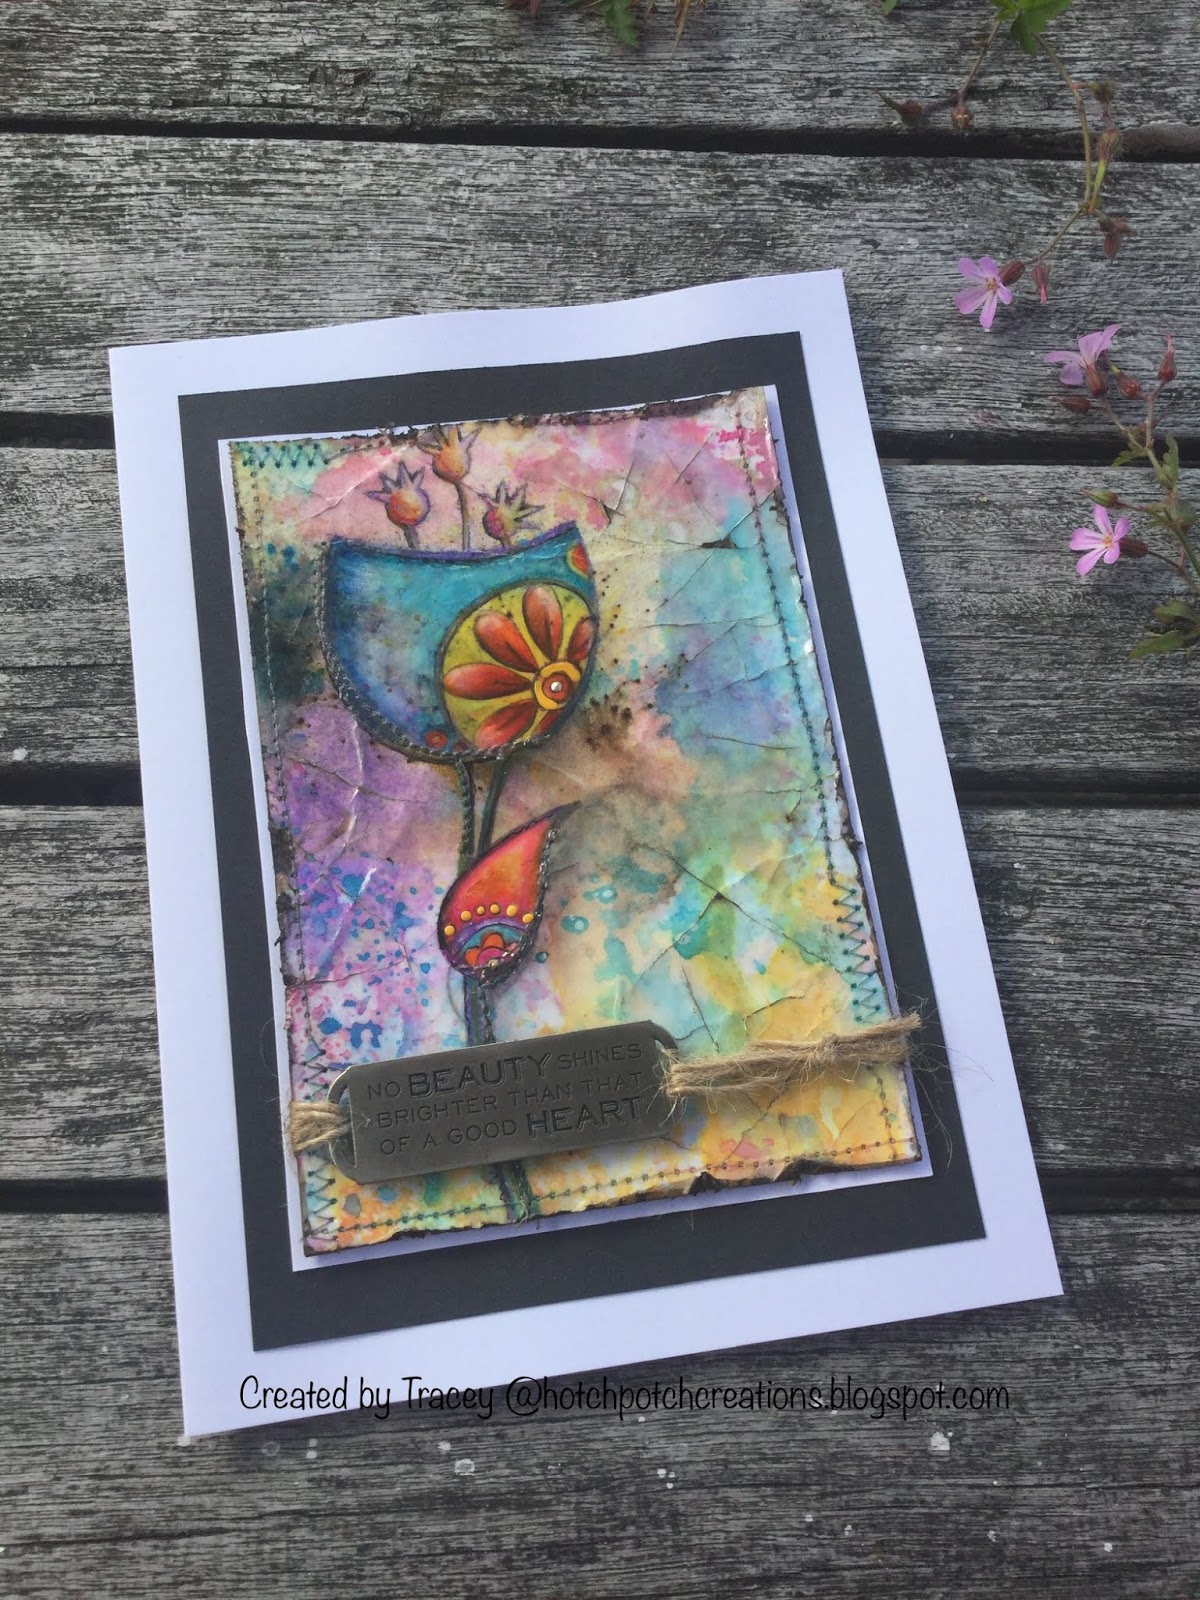
I came across this distress oxide background amongst my scraps pile. 
 I love how those cracks appear so strong through the crackle paste 
when pushed through one of my favourite Paperbabe Iso Fun Stencil.


The colours were a perfect match for my latest Paperbabe design 
using the Dinky 3/4 View stamp teamed with the Micro Fringe template.


stamping flowers from the Flourishing Hair Set help adorn her outfit 
with a little bit of bling to balance that scrummy gold crackle paste..


As if she awaits her destiny this A5 mixed media journal page may well 
turn into a card topper as the Birthday Wishes sentiment quietly awaits.


Come see what the rest of the DT have created to inspire you 
and *Please* share your stamped Birthday creations with the team 
over HERE you DO NOT have to use Paperbabe Stamps to join in...

Stay safe & keep creative everyone 
Sending light & good wishes your way

Tracey xx

Sharing today's creativity with: 

Paint Party Friday ~ Week 5 Year 10 
Rain's Thursday Art Date ~ Stencil Art 
Art Journal Journey ~ Valerie's theme Geometric Shapes

Wednesday, 17 July 2019

What's on your workdesk? Wednesday #528

Hello Creative Friends,

It's midweek meet up time again.. yup it came around that fast!
Another Wednesday where we share What's on (y)our Workdesks.. 

I'm sure it's WoywW #528??


Well my creative workspace is virtually untouched. 
Shoshi wondered what the wooden block tied with string 
was all about on last weeks desk, well this week it's multiplied.

I came across an ice-cream tub full of them during my clear out,
I made these must be 15 or more years ago for a pre-school group 
using spindle spacers and string. Mark making tools for little hands 
they are well loved as was the glitter that's stuck to them solid. 

I must give them a soak and see if they still work.. 
Something else to add to my weekend To-do list ..


I've had a fabulous week, full of family time starting with Lunch out
last Wednesday with Mom. Family get together's over the weekend 
followed by my sweet Daughter's 21st Birthday yesterday...😊

Here's the card I made for her


Sadly this photograph was taken on a very dreary day so here's a 
close up. Love that rainbow of colour given from the D'OX's. 
I'm sharing this with the ladies over at Try it on Tuesday
 and joining in with their ~ Colours of the Rainbow Challenge.


I can also share this with you today.. 
Another make for my Daughter's Birthday.

A Gift card created using my latest favourite stamp 
distressed wallpaper by Andy Skinner, how lovely is that print..!


The gift card is held closed with organza ribbon and a pin stamped 
with 21 embellished with a single wrapped opaque red ruby.


Inside the gift card holds a handmade keyring. A bronze wire wrapped cabochon 
bearing her star sign Cancer decorated with an elaborate ruby birthstone tassel. 
I'm pleased to say my little precious loved it..


I'm sharing today with A Vintage Journey ~ Precious Metal Challenge. 

I've some errands to run today so scheduling this post early.
After all the fine food and cake this past week I'm in need of the exercise.

Look forward to catching up with you all.

Take care everyone
Creative Hugs
Tracey xx

Friday, 5 July 2019

Paperbabe Challenge ~ #97 Sketch Challenge

Happy Friday Creative Friends, 


 This fortnight we give you a Sketch prompt. 
Use the design below, let your creativity flow 
and come share your creations with us HERE ... 

There's a Paperbabe prize each fortnight..


Let me take you through this CAS journal page... 

Masking off an area at a jaunty angle peeled paint and broken china 
DOx are applied with a blending tool. I just love those blues and green's. 
Droplets of water expose the white underneath when lifted off with tissue.


Onto Kraft card I stamped profiles from both LEFT and RIGHT Dinky sets 
and used the Dinky hair templates to help guide those flowing locks.


Colouring the images in pencil the masks within the dinky 
template set protect the detail whilst adding that DOx blend.


The little freckle stamp in the profile set fits neatly 
on the end of my finger, dipped into salty ocean DOx 
it's dabbed amongst those background splashes.

Removing the masking tape reveals a clean crisp line 
where stamps taken from the alphabet BUNDLE build the 
word Sisters bringing both image and word together.


Sending a simple harmonious message 
that we're all Sisters under the same sky.


Pop on over HERE to see what the DT have created and
 come join us in this fortnights Paperbabe Challenge. 

Take Care everyone and 
look after one another..

Creative Hugs 
Tracey xx

I'm sharing today's creativity with: 
PPF ~ WK18 Y9 
Art Journal Journey ~ We're all/going Challenge 
Country View Crafts ~ Blues and Greens
The Artistic Stamper CTB ~ July Celebrating Woman

Friday, 21 June 2019

Paperbabe Challenge ~ #96 Spot and/or Stripes


Happy Summer Solstice creative friends
Welcome to Summer!

There's a NEW Blog Challenge over @ Paperbabe Stamps
and it's all about Spots and Stripes this fortnight..


After living under a rain cloud today the sun shines bright.
So let me share a project that like the weather has changed
it's face quite a few times before sitting down to rest.


Playing with the new Dinky Stamps and Templates it's very
easy for me to lose myself in the colouring and shading.


From an A5 journal page i've traced around the cover of a 
found small notebook to give me the correct measurements.


The bow template tidy's up her rag tail hair and can you see the 
Doodle Stars in spots and stripes that decorate her Summery T...


Cut down to size my Dinky Journal cover is complete. 

The inside is a work in progress but you may 
catch a glimpse of what's inside very soon...


Please pop over HERE and see what the Paperbabe Design Team 
have created this fortnight, we are all loving the NEW Dinky's. 

Wishing you all a little sunshine today.  

Creative Hugs & Best Wishes 
Tracey xx

I'm playing along with:

World Wide Open Design Team ~ Challenge #06
Crafty Card Makers ~ Anything but a Card #236

Friday, 7 June 2019

Paperbabe Challenge ~ #95 Picture Inspiration

Hello Creative Friends 

New challenge time over at Paperbabe stamps where we 
give you a beautiful picture for creative inspiration. 

Use the image in any way you wish and come and share your 
creations over HERE... There's a prize for one lucky winner.


Using a handful of the all NEW Paperbabe Dinky stamps, 
stencils and templates, along with Distress Oxides, 
paint and pencil here's a taster of what I created. 

It's as if she softly sleeps upon a carpet of wildflower.


Why not pop on over HERE to see what the Design Team 
have also created and join in with the Paperbabe challenge. 

All NEW Paperbabe Products available HERE

Sending creative wishes your way.
Hugs Tracey xx

I'm sharing Friday's creation with: 
Kristin & EVA over at PPF Wk 15 Yr 9

Thursday, 5 October 2017

Acorns and Oak Leaves Acrylic ATC...

Hello everyone, i'm all of a muddle this week as i've been blessed with the lurgy again and my crafting mojo has taken a downward spiral as my brain has been a beehive of activity but my body not had the energy to put any of it down on to card or canvas.

Today i'm sharing a sneak peek of a That's Crafty make as I have moved into
Thursdays seat in which Nikki had kept so warm for a while.

For the full picture and how to do's please click the pink link HERE


Tomorrow ( Friday 6th October) That's Crafty are showcasing some fabulous
products on Hochanda don't forget to tune in or pop it on to record as Neil Burley
will be waving his creativity at you all at 8am and 11am (GMT).

You may spot some mini makes and a lot more inspirational from the That's Crafty DT.

Thank you for your company everyone
until next Thursday.

Take Care, Stay Safe and Stay Warm
Creative Hugs

Tracey xx

Wednesday, 16 August 2017

*Anniversary Wishes*

Hello everyone.. Thank you for stopping by.

I don't often post makes that are personal but as today is a special day
and this stamp set makes me giggle each time I use it 
I thought I would share this one with you all.

Here in words and pictures are those How to do's..
Weeeeeeeeeee...!!!!


Using Tim Holtz sentiment dies I cut out the words adding colour by
mopping up some spritzed Antique Linen and Salty Ocean Distress Oxides


The balloons were stamped, heat embossed, coloured with pencil and cut out.
Using foam pads I began to build up the balloons each one representing a year..
*It's a BIG Bunch*


Strings have been drawn on the Balloons using a fine liner pen and 
the stamped and embossed girl adhered as if she is flying off the card.
Mat and layered onto black card helps those words pop.


My Anniversary card is complete!


*Happy Anniversary Hubby*

Let the fun times continue xxx

Until next time, stay safe everyone
Creative Hugs
Tracey xx

I'd like to enter this into the
Rubber Dance Stamps EMBOSSING Theme Challenge.

Crafty Supplies:

AALL & Create Clear Stamps: #5 Designed by Olga Heldwein
Versafine: Onyx Black Ink
Clear Embossing Powder
Tim Holtz Thinlit Dies: Sentiment Words
Tim Holtz Distress Oxides: Antique Linen & Salty Ocean
Coloured Pencils (Caran d'ache Supracolor ~ my personal choice)
Water Colour Card/Black Card
Foam Pads

Tuesday, 18 July 2017

My Mini *Safekeeping* Book..

 Today i'm sharing a Mini book I created using an off cut of Hammer Card with a Distress Oxide/Sparkler Spray mop up background and the Beautiful You stamp set from
Rubber Dance Stamps Designed by Deborah Wainwright.

Here in lots of words and pictures is my Mini *Safekeeping* book.


Using StazOn I stamped onto clear Shrink Plastic. I've never had much success stamping onto clear as there's no tooth to it but using the Tim Holtz stamp platform really does keep the worry of it sliding around at bay. The image was coloured from the reverse side using Posca Markers. This takes some time to apply as the paint takes a while to dry so be patient if you intend to try this as you don't want to smudge it... it will dry eventually. 


Whilst the paint was drying I set about adding detail onto my 22cm by 7 cm sized off cut by machine sewing twine around the edges of what would be my mini book cover when folded. Using another off cut an insert was created with flaps to hold tiny useful things.


When the paint had dried the image was shrunken down in a pre-heated oven. 
An aperture was cut from the book cover and twine sewn around it's edge. 
This would be the window for the shrink plastic tile to peep through.


I placed the tile over the aperture and surrounded it with foam pads, this helped to level the page and also act as a cushion to protect the tile. The insert was then glued over the top and held in place with bulldog clips until the glue was completely dry. 


Sheets of folded paper are held with twine in the centre of the book cover for those little notes or lists and easily replaced when used up. Those bits and bobs that I tend to carry around with me but always fail drastically to find when needed are all now held in place.


A twine tie with some decorative Tyvek Beads help to keep it all neatly together.

My Mini *Safekeeping* Book is complete.


I've never made a mini book like this before and now folded it measures only 7cm x 11cm. 
A handy size to keep in my bag and a lot easier to find all those bits and bobs. 
I think i will definitely be making another. 
I'd like to share this with the Rubber Dance Stamps Team and join in their 

 Thank you for sharing your time with me today, 
I look forward to sharing with you all again soon.

Creative Hugs
Tracey xx

Crafty Supplies:

Rubber Dance Stamps ~ Beautiful You
StazOn ~ Jet Black
Tim Holtz Stamp Platform
Distress Oxides
Shrinkles Shrink Plastic (Clear)
Twine/Thread
Hammer Card
Tyvek
Bits and Bobs from the bottom of my bag.

Friday, 24 March 2017

Sweet Dixie .. Lilly Make a Wish

This Friday I am featuring a card created using stamps designed by 
Kath Halstead Sweet Dixie Lilly make a wish from Personal Impressions.

I love this Water Lily border it reminds me of those wondrous paintings by Monet.

Here's my quick and easy not so Monet creation.


A background was created by blending Tim Holtz Faded Jeans 
Distress Oxide ink onto watercolour card. Water has been splashed onto the 
background and blotted to help lift some of the colour off. 

The Water Lily border has been stamped and embossed across it.


A watered down wash of white Gesso is applied to make the background more
 subtle and enables the colour lifting off to pool around the embossed areas..


 When dry the Water Lilies have been coloured using a White Posca 
Marker and Kuretake wink of stella brushes.


The Dream sentiment along with the flourish swirl has been stamped, 
embossed and the card edged with Faux stitching before mat and layering.


Thank you for sharing your time 
and what ever you are up to this weekend have a wonderful one.

Hugs from Tracey xx

Friday, 10 March 2017

Sweet Dixie Wall Flower

This week I have been playing with another of Kath Halsteads new releases
 Sweet Dixie Wall Flowers Happy Birthday Stamp set from Personal Impressions.


First I created a background using Tim Holtz new Distress Oxide inks, using Vintage Photo, Fossilized Amber and Spiced Marmalade. Applying the ink with cut and dry foam I removed part of the design by splashing and dripping water lifting it off with blotting paper.


Small amounts of DecoArt textured Sand paste was dabbed randomly
onto the background, when dry the edges of the background torn
and areas carefully burnt through to add a little interest.

The main wall flower image was stamped centrally onto the background adding the
brickwork stamps both top and bottom of the image to extend the design.
The focal image was also stamped separately for use as a topper.


Coloured using ProMarkers the topper has been distressed using 
walnut stain distress ink. Faux stitching, lace and white pen adds to the detail.


The roses have been multi stamped, coloured and layered. The With Love sentiment added and a distressed bulldog clip helps to break up the squareness of the design.


I chose to mount this creation onto a 6" x 6" Canvas 
but it would make a great card for a loved one.

Thank you for sharing your time, I wish you all a fabulous weekend.

Creative Hugs from Tracey xx