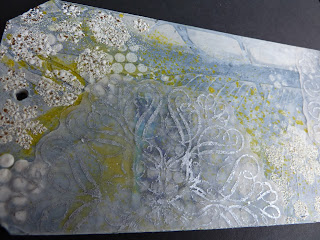
A little Social Media Group I am a member of sets challenges and tasks of the *Mini* kind and I've had the great pleasure of sharing in some of their challenges from decorating lollypop sticks to 3" Fabric swatches, At times we swap and sometimes we share but there are times when we just soak up everyone's creative makes if we find life is just a little bit too busy to join in.
In September 2016 a challenge was set to create a Tag from a series of mini instructions. We did not know how long the challenge would last all we were told was once a week we would be give a short instruction and not to spend more than 10 minutes on each.
Each instruction was a guideline and however you interpreted them could be modified depending on readily available resources.
This is what I created during those 12 weeks..
I hope you can follow me on my fast track 12 week journey in words and pictures.
Week 1:
Find or create a tag; any colour, texture or size.
Add one layer of gesso.
when dry add one colour.
*Tando Creative 6" Greyboard Tag painted with white gesso, when the gesso was dry
DecoArt Dark Grey was applied using a roller*
Week 2:
Add a further paint colour to your tag and while it is still wet, draw or write into it
with the end of a paintbrush or pencil'.
* DecoArt Quinacridone Gold was again applied using a roller and the words RUSTY
scribbed into the wet paint*
Week 3:
Press modelling/gel/grunge paste through any stencil of your choice.
*This is what it looked like when it had dried*
Week 4:
Add some collage with matte/gloss medium, collage Page or your preferred glue.
Add a layer of matte medium over the top of the collage piece/pieces.
*I Randomly adhered torn Kaisercraft papers using DecoArt Matte Medium*
Week 5:
Add a layer of translucent paint.
* I just watered down some Yellow acrylic paint*
Week 6:
Spray or drip a contrasting colour of paint or ink across/down your tag.
*I Sprayed Dylusions White Linen Spray*
Week 7:
Add more stencilled layers
*Black Gesso was dabbed through a cogs stencil*.
* Instructions 5, 6 & 7 were completed together hence spray leaking through the gesso*
Week 8:
Use clear gesso to completely cover your tag.
*As you can see the clear gesso has dragged most of the Dylusions spray off the tag*
Week 9:
Stamp one or more images across your tag.
*Industrial Lamps stamped with Town House Teal acrylic paint, both from Indigoblu*

Week 10:
Cut out and adhere a main focal image to your tag. This can be drawn, stamped, collages, downloaded or cut from a book/magazine.
*I used an image I had previously stamped and embossed - a Dragonfly from
Week 11:
Add doodles, marks and/or embellishments to your tag.
*I added a Butterfly image again from Inky Doodles Time Flies stamp set
and doodled & highlighted using Posca Marker Pens*

...and finally
Week 12:
Find a word in a book or magazine to attach to your image.
*Words added from yet again Inky Doodles Time Flies stamp set*

... and the Tag is complete..!
Now the whole experience of being given small instructions once a week may seem simple but I found the whole experience like having a cookie and only being aloud one bite a week. A CRAFTING DIET well... its quite unheard of, but what I did find was when the twelve weeks were over I actually missed these weekly instructions...
So now the new year has well and truly arrived I have decided that each month I will create a new Tag using the same instructions, there maybe a theme to them as now I know each step that lies ahead but it maybe random.. and of course I don't need to wait one week for the next task as it has already been written.
Thank you to Chris Cresswell for those tasks of wisdom and Thank you to Kaisia from *WanderLust 2016* for encouraging Chris to pass on your inspiration you may have created a mini monster.
*Watch this Space*...I hope you can all share your time with me on my mini adventure..
Creative Hugs from Tracey xxx


