Pages

Showing posts with label IndigoBlu Luscious pigment powders. Show all posts

Friday, 19 May 2017

From dispose to compose..

This little make was totally unplanned but i'm blaming Lynne Moncrieff for the distraction with her enticing and ever inspiring blog this week. I too have stash that I just look at, save for that special project or just don't use because it's far to nice, I feel so guilty about it. 

So whilst on the super stash hunt I came across a not so super jar of oddments, unappealing, uninspiring and one step away from being thrown away but 


before I got that far I found myself analysing the contents asking myself 
what was wrong with it and why did I want to get rid of it..?? 
Well when you start asking yourself  why you want to throw stuff away it becomes 
a little worrying... Sounds like a good time to make something!

Here is my *Dispose to Compose* Canvas in words and pictures.

Using a 5x7 Lace covered canvas I glued on the oddments along with an embossed and stamped aperture tag. When dry the whole canvas was painted in white Gesso repeating the process until the embellishment were completely covered.I gradually added colour  using water soluble wax pastels activating with water and reapplying when dry.


When the colour build required was achieved 


I applied VersaMark watermark pen around the edges of the embellishments 
and dusted with Green and Gold pigment powders. 


Gaps between the embellishments were filled with glue and micro beads sprinkled atop. 


With a fitting sentiment placed in the frame window and a 
large charmed focal embellishment my Canvas is complete.
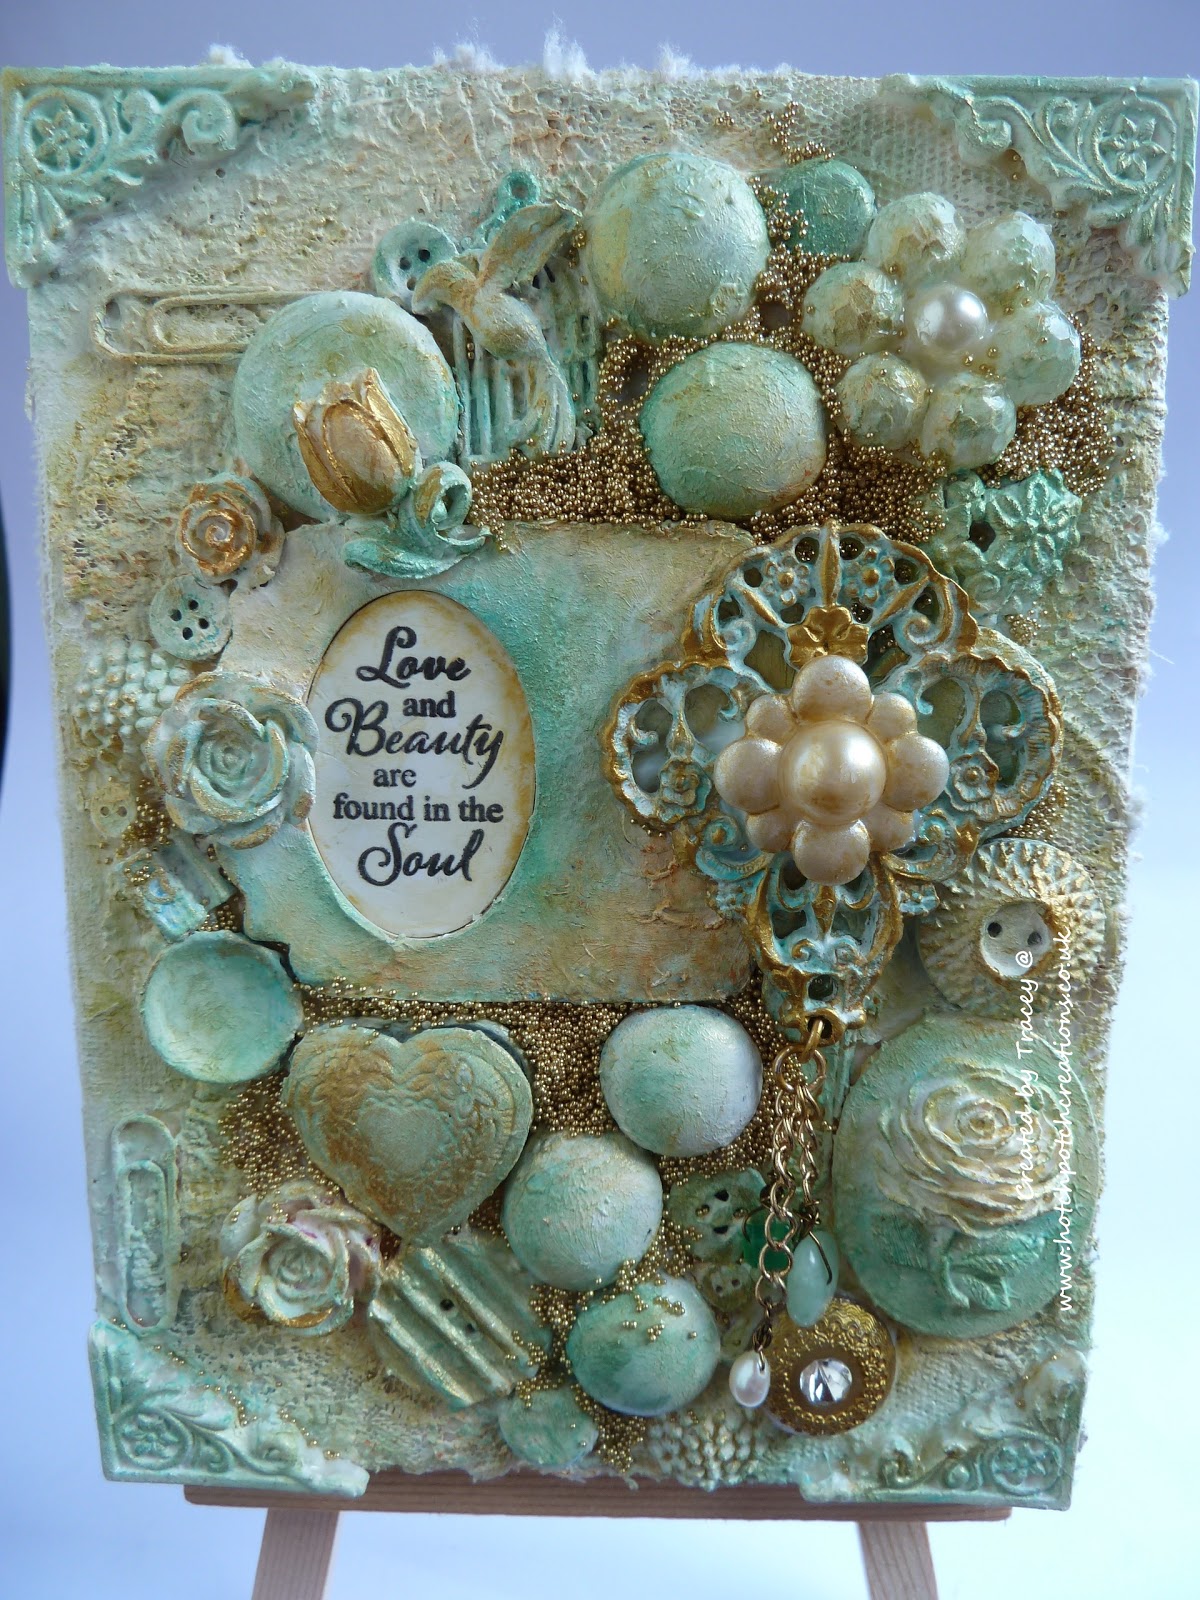

I've seen some amazing pictures and canvas's produced using similar techniques to this and I have to agree they can transform any old bits and bobs into a masterpiece. 
The problem now is I'm not too sure I will throw anything away after creating this..!

Thank you for your company.. Have a fabulous weekend.

Creative Hugs Tracey xx

Crafty Supplies:

5x7 Canvas
Embellishments, bits, bobs, Micro Beads and a sentiment.
Caran D'Ache Neocolor II Summer Edition
IndigoBlu Luscious Pigment Powder Green and Gold
Versamark WaterMark pen

Sunday, 12 March 2017

On the cusp of Spring..

As time plays a big factor in March and we lose an hour with BST its an early reminder that the lighter nights will soon be upon us along with awakening nature and floral beauty.

Today I'd like to share a project I finished a good few weeks ago..


Using a plywood painters palette I first coated it in white Gesso.
Mixing Pink Iced Gem acrylic paint with IndigoBlu Super thick slap it on I used the
Girl in Profile stencil as a guide to create the face profile.


Versamark embossing ink has been stamped through the Laurel Leaves Stencil with Luscious pigment powders Gold, Bronze and Penny Dreadful gently dusted on top.


Images are stamped from both A5 IndigoBlu Live Laugh Love and 
the Blooming Great stamp sets.


By adding drops of water to a small amount of decanted Luscious pigment powder the stamped images have been painted using Coral, Raspberry, Gold, Buttercup, Lawn, and Purple. They have then been cut out and scrunched up to give a worn look.


A hole has been measured and punched into the palette ready for the clock fitting and a layer of white Gesso applied over the whole image to make it sink into the background.
Super Thick Slap it on was then been pushed through the Small Clock Face Stencil.


As Super thick Slap it on dries clear Gilding wax has been used to highlight the clock face. The small flowers from the Blooming Great stamp set have been placed on the
3rd, 6th, 9th & 12th Hour making it easier to read the time from afar.


Butterflies and Dragonflies have been randomly stamped onto the palette from the
Live Laugh Love stamp set and Painted with Rose, Poseidon Blue and Lawn Luscious pigment powders before assembling the clock mechanism.


The scrunched and cut flowers and leaves have been applied after the clock mechanism was fitted as I could then see the surrounding space and make sure both flowers and leaves did not interfere with the clock hands as they moved around.


I'd been waiting for the right project to come along to be able to use this paint palette 
and I must say the image created seems to fit perfectly. 

Thank you for your time, I hope you have been inspired.

Creative Hugs from Tracey xx

Tuesday, 28 February 2017

Sweet Dixie Flourish Frames for Him & Her... using Shrink Plastic..

Today I share a handful of embellishment and Jewellery makes using Kath Halsteads Sweet Dixie Flourish Frames from Personal Impressions all made from Shrink Plastic.

Shrink plastic is *Fantastic* and if you haven't used it you need to as it does exactly what it says... it Shrinks, transforming your stamped images into a smaller versions using heat.
Its as simple as that.

As you can see from the stamp sets true size the images really do shrink in size.


Stamping onto Shrink Plastic using StazOn it is wise to punch a hole before you heat it
if you wish to make a pendant or create dropper earrings.


These earrings have been made using clear shrink plastic so the 
male silhouette can be reversed to face the female silhouette.
The card has been created simply stamping the flourish stamp with versamark ink, 
dusting over with mica powder and embellishing with flat back pearls.


Stamped and cut out using a 2 1/4" punch. the shrunk image is glued into a 
25mm brooch and a domed glass cabochon adhered on top.

Placed onto a card, it makes a lovely gift card for someone.


Creating a Keyring, the male silhouette is stamped using Jet Black StazOn onto the shrink plastic and  a 2 1/2" circle punch used to cut the image out. After it has been heated and shrunk it is fitted into a 30mm keyring pendant.


and finally.. a simple shrink plastic embellishment for a Male Birthday card using the 
Happy Birthday sentiment included in the stamp set.


As you may have observed I have not given you the instructions on how to shrink the plastic there is a variety of brands with differing instructions of ways you can reduce its size. If you follow the instructions you should achieve successful results.

Thank you for your shared time..
I look forward to bringing another creation to you very soon.

Hugs Tracey xxx