Pages

Showing posts with label MDF. Show all posts

Sunday, 20 May 2018

Sneak peek of New Crafty Treats ...!!

Happy Sunday Everyone

I'm sharing a handful of sneak peeks today
as That's Crafty have lots of new products and
will be showing them off on Hochanda TV tomorrow..

Monday 21st May at 11am and 3pm (BST) where Neil Burley
will be demonstrating new products and sharing hints and tips.

Here's those sneak peeks..


and I do hope you can tune in/record or watch on catch up
and see what the That's Crafty Hochanda DT have been up too.

Have a super Sunday

Crafty Hugs
Tracey xx

Thursday, 5 April 2018

Pencilled Stencil - The Owl

Hello Creative Friends Happy Thursday.

Today I'm sharing a sneaky peek of a That's Crafty Creation
with the full How to do's over HERE


I do hope you have the time to pop on over to the 
That's Crafty Blog and check it out.

Hope to see you over there.

Wishing you much creativity

Crafty Hugs
Tracey xx

Friday, 7 July 2017

1, 2, 3 ATC

WELL..!!  I can hear you all say "What's all this Mess?" 
Grab yourself a cuppa and i'll tell you all about it..


Well this project all started with the words *Found* a Theme given for an ATC Swap I contribute to each month. I have so much stored away in pretty jars but the majority of it has little or no importance, just odds and ends hidden away with the hope of discovering that hidden gem each time I rummaged through it...

The Blog Challenge Theme for the next fortnight over at That's Crafty is *Anything Goes* and these little ATC's seemed to fit the bill nicely, showing that you really can create something from nothing.. 
I hope you can pop along and check out all those inspirational makes from the DT and maybe join in as there's a chance to win a £20 voucher to spend in the That's Crafty Store.. 

Here in words and pictures is my 1,2,3 ATC

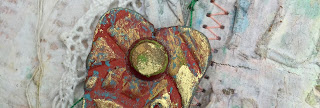
Covering an MDF ATC in a layer of lace I Gesso'd over the top and added some of those 
bits and bobs, sticking them down with lots and lots of heavy body gel. 


I added micro beads into the exposed gel and then left them for 7 whole days.. yes 7!! 
As the amount of gel used was so thick and I knew these would be travelling to a new destination I needed to make sure that the gel had cured properly and also that those items would stay where I had put them..!


..One week later.
All dry and stuck down firmly.. so time to play.
I coloured each ATC differently using neocolor pastels and covered with mat medium to protect any further movement of colour. These colours were my base coat on which I could build up with more colour.


Now this is my favourite bit, bringing out all the detail by using raw umber paint and coordinating coloured alcohol markers around each element. Creating depth, shade and highlighting those prominent areas with bronze, antique gold and antique silver shimmer paints to give the appearance of reflection of light with a dot and dab of white Posca Pen.

Each ATC is finally edged with a little gilding wax.. and my ATC's are complete..


You really do need something substantial to adhere so much onto as you do not want them to buckle or bend whilst on their travels. The MDF ATC's are fabulous surfaces to work on and I believe they have now found new homes.. hopefully well received.?

Thank you for sharing your time, I hope you have been inspired.
What ever you are up to this week I hope it's a crafty one.

Stay Safe.. Creative Hugs.. Tracey xx


Crafty Supplies:

Bits and Bobs from my own crafty stash!
 Alcohol markers (Browns/Greens/Blues) Not my best ones.
That's Crafty MDF ATC's 
That's Crafty White Gesso
Heavy body Gel
DecoArt Matte Medium
Carn D'ache neocolor II water soluble pastels
DecoArt Raw Umber
That's Crafty Shimmer Paints
Prima Finnabair Art Alchemy Metallique Wax
White Posca Marker Pen

Friday, 28 October 2016

Chalkboard Christmas.

Last Christmas I created projects very similar to these. 
Using Sweet Dixie *Christmas spent with Family* stamp set Designed by Lindsay Mason from Personal Impressions, I have replicated previous makes.


Using an MDF tag painted in Black Gesso and sanded back I stamped the sentiment using White VersaCraft and heat embossed with Sweet Dixie Glacier White Ultra Fine embossing powder.


Trying to achieve the chalk board effect I did not use an anti static bag hoping the MDF would attract the odd speckle of embossing powder. From the picture below you can see that it does just that.


The Holly leaves did not fit onto the tag without obscuring the wording.

It is possible to get a negative print of an image if you stamp onto tissue paper. 
As tissue paper is absorbent the ink sinks easily into it, making the reverse side 
a negative image to the stamp. 
Doing this allowed me to fit the Holly Leaves onto the Chalkboard tag perfectly. 
The Holly has been scruffy coloured using Derwent colour soft pencils, cut out and adhered onto the tag using Mat Mod Podge.

Taken from Lindsay's Christmas Tweets Stamp set


I embossed both top and bottom of the tag to replicate snowfall and added 
flat back red pearls to create realistic berries. 
These tags can be Tree ornaments, or maybe add a magnetic strip to the back to create a magnet, either would make a great stocking filler.


A Tag shaped Christmas card has been made in the same way,
 this one displays two of the seven sentiments within the set.


These are very effective Christmas makes but the concept could be carried on 
all year round with minor adaptations. 

Thank you for sharing your time with me, I hope you have been inspired.
Creative Hugs from Tracey xx